Procedure 2.1. Creating A Connection
To being working with the topic maps in a persistent store, you must first create a connection to the store. In the TM4J Administrator's Tool a connection is referred to as a "Provider" as it provides access to the topic maps you will work with. The following steps take you through the configuration of a new provider.
Select
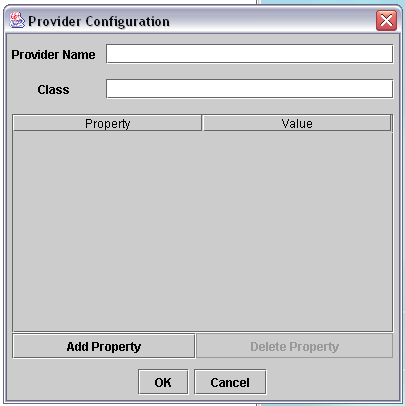
"File"->"New Provider". This will bring up the Provider Configuration dialog.In the field labelled
"Provider Name", enter any meaningful name you want to give this provider. This name will be displayed in the tree view of the main screen and stored in the XML configuration file generated by the TM4J Administrator's ToolIn the field labelled
"Class", enter the name of the TopicMapProviderFactory class that handles the kind of connection you want to make. The following values are supported by the standard TM4J installation:Table 2.1. Allowed Values For the Provider
"Class"FieldValue Description org.tm4j.topicmap.hibernate.TopicMapProviderFactoryImpl Use this value to create a connection to a persistent store in a relational database created using the TM4J Hibernate backend. org.tm4j.topicmap.ozone.OzoneTopicMapProviderFactoryImpl Use this value to create a connection to a persistent store in an Ozone OODBMS. org.tm4j.topicmap.memory.TopicMapProviderFactoryImpl Use this value to create an in-memory provider that reads from XTM/LTM files on the file system. Note
Currently, the TM4J Administrator's Tool only establishes connections to existing persistent stores and cannot be used to create a new persistent store instance. Please refer to the TM4J Developer's Guide for details on establishing a persistent store.
Add configuration properties for the connection. To add a new property, press the
"Add Property"button. This will create a new entry in the table of properties that is shown above the button. To set the property name and value, click on the table cell and type directly into it. To delete a property, select the property to be deleted and click the"Delete Property"button.When you are happy with the properties, click
"OK"to attempt to establish the connection. If for any reason the connection could not be established, an error message will be displayed and you will be returned to the"Provider Configuration"dialog to modify the class name and/or properties you entered.